

Common Reasons for Marine Electronics Failure Explained

Quick Summary
Common reasons for marine electronics failure include unstable power from voltage drops, corrosion from saltwater, galvanic and stray-current damage, and bad grounds. Intermittent faults such as rebooting screens or drifting readings usually point to loose connections, voltage problems or moisture rather than a dead component. Checking power, connections and grounds before replacing parts often finds the real cause.
- Measure voltage at the battery and at the device under load to spot resistance in the wiring.
- Clean corroded terminals and check ground connections, since bad grounds cause erratic readings.
- Follow a seven-step diagnostic workflow and replace parts only once the cause is clear.
- Stop and call a qualified marine technician if you see burning smells, scorched insulation or water inside a sealed unit.
Table of Contents
- What Marine Electronics Failure Usually Looks Like
- Power Supply Problems and Voltage Drops
- Corrosion, Saltwater Damage and Bad Grounds
- Boat Electronics Not Working? Start With a Systematic Diagnostic Workflow
- Switches, Breakers and Wiring Faults to Check First
- Marine Electronics Troubleshooting Safety Boundaries
- Preventing Failures and Deciding When to Call a Technician
- Frequently Asked Questions
What Marine Electronics Failure Usually Looks Like
Last Updated: November 4, 2026
Marine electronics failure rarely starts with a dead screen. More often, a chartplotter reboots on its own, a depth reading jumps around, or a VHF radio cuts out just when you need it. These signs point to common reasons for marine electronics failure, and catching them early saves time and money.
A marine electronics failure is any fault that stops a device from working as it should, whether the device is a GPS, radar, sounder, autopilot or radio. Some faults are total, while others are intermittent and hard to pin down.
Watch for these common symptoms:
- Screens that flicker, freeze or reboot without warning
- Readings that drift, spike or drop to zero
- Devices that work on the dock but fail under way
- Units that power on but show no data from sensors
- Radios or AIS units that lose signal in certain conditions
Intermittent faults cause the most frustration. A device may work for hours, then fail, then work again. This pattern usually points to a loose connection, a voltage problem or moisture rather than a dead component.
Power Supply Problems and Voltage Drops
Power supply trouble causes more electronics faults than most owners expect. Marine electronics need a stable voltage to run correctly.
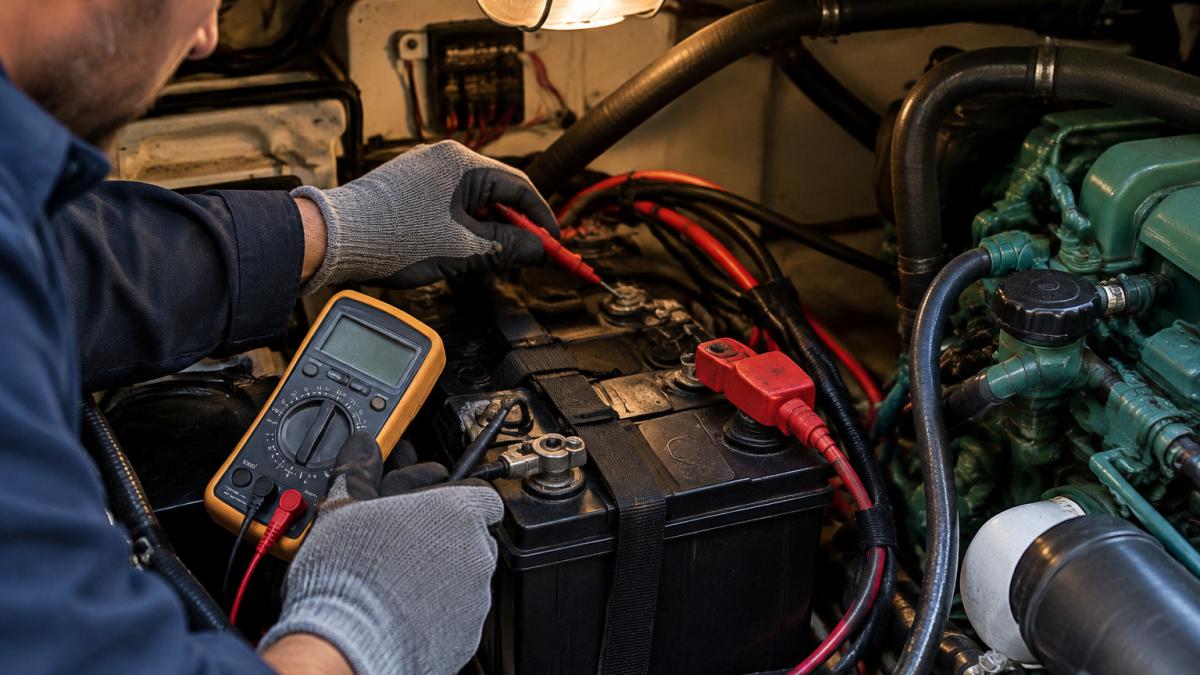
A voltage drop happens when power loses strength on its way from the battery to the device. Long cable runs, undersized wiring and corroded connections all increase resistance.
Check these areas first:
- The battery itself, including its charge level and age
- The charging system, including the alternator and charger output
- Cable gauge, especially on long runs to the bow or mast
- Terminals and fuse or breaker connections
- The electrical panel where circuits split
A simple test helps. With the device running, measure voltage at the battery and again at the device's power input using a multimeter.
Watch out: never work on live circuits or open a sealed unit without first switching off the breaker and disconnecting the battery. Shorts on a boat's DC system can cause fires and burns.
The article's key voltage checks can be scanned at a glance, so here is a quick reference for the power supply areas to inspect first.
| Check area | What to look for | Why it matters |
|---|---|---|
| Battery | Charge level and age | Weak batteries cause electronics faults |
| Charging system | Alternator and charger output | Keeps voltage stable under way |
| Cable gauge | Undersized wire on long runs | Increases resistance and voltage drop |
| Terminals and fuses | Corrosion and loose connections | Adds resistance at the weak point |
| Electrical panel | Points where circuits split | Shows where power is lost |
Corrosion, Saltwater Damage and Bad Grounds
Saltwater is hard on electronics. Salt, moisture and humidity work into connectors, terminals and grounds over time. To learn how to spot these signs early on deck hardware and fittings, read our guide on signs of corrosion on marine deck hardware.
Three mechanisms account for most marine electronic corrosion:
- Galvanic corrosion. When two dissimilar metals sit in contact in the presence of an electrolyte such as saltwater, the less noble metal gives up material. A tinned copper wire landed on a stainless fastener, or an aluminum connector body against a brass terminal, sets up a small battery that eats the weaker metal. This is why marine-grade terminals use tinned copper and why mixing metals without a barrier is a common mistake.
- Stray-current corrosion. A fault in the DC system can push current through the water and into underwater metal, or through a shared ground path. Unlike galvanic corrosion, which is driven by the metals themselves, stray-current damage is driven by the boat's own electrical system and can consume anodes and fittings quickly. A pattern of fast anode loss is a warning sign worth investigating.
- Electrolytic and crevice corrosion. Trapped moisture in a connector body or under a cable gland creates a small oxygen-starved pocket where corrosion concentrates. This is why a connector that looks fine on the outside can be green inside the shell.
Look closely at these spots:
- Corroded terminals on batteries and distribution blocks
- Green or white buildup on connector pins
- Loose or discolored ground connections
- Water inside connectors, junction boxes or cable glands
- Salt residue around radar scanner mounts and antenna bases
- Anodes that are consumed faster than expected
A bad ground is a common hidden cause. Because corroded fasteners can weaken a ground connection, understanding saltwater corrosion effects helps explain why even sound wiring needs regular inspection.
To test a ground rather than just look at it, use a multimeter on the resistance or continuity setting with the power off. Measure from the device's ground terminal to the battery negative post.
Watch out: never work on live circuits or open a sealed unit without first switching off the breaker and disconnecting the battery.
Boat Electronics Not Working? Start With a Systematic Diagnostic Workflow
When something fails, resist the urge to replace parts right away. A structured process helps you find the real root cause and avoid buying hardware you do not need. A fault does not always mean the equipment itself has failed, and replacement is not always the only answer.
Bluewater NMEA 2000 T-Connector [2702-12-012] →
Follow these steps in order:
- Describe the symptom. Write down exactly what happens and when it started.
- Check the obvious. Confirm power, fuses, breakers and switch positions.
- Inspect connections. Look for corrosion, loose wires and damaged cable jackets.
- Test voltage. Measure at the battery and at the device under load.
- Isolate the device. Disconnect other units to see if the fault follows one device.
- Check configuration. Confirm settings, software versions and network setup.
- Decide next steps. Repair, clean, reroute or replace only once the cause is clear.
Keep notes at each step. A clear record makes it much easier for a technician to help if the problem remains unsolved.
Switches, Breakers and Wiring Faults to Check First
Many "dead" devices are fine. The problem sits in a switch, a breaker or a wire. These are the quickest checks and often the most productive.
- Breakers and fuses: A tripped breaker or blown fuse stops power completely. Reset or replace it, but if it trips again, find out why before you reset it repeatedly.
- Switches: Test that the switch passes power in every position. Worn switches can fail intermittently.
- Wiring: Check for pinched, chafed or heat-damaged insulation, especially where wire passes through bulkheads.
- Connectors: Confirm that plugs are fully seated and locked. A partly connected plug can mimic a serious fault.
Good quality connectors and marine-grade wire make a real difference. Our product catalog includes NMEA 2000 connection hardware from Bluewater, which provides connection points for expanding an NMEA 2000 network, and a Connect-Ease Multi 5 Fused Lead Accessory Connection System for connecting multiple accessories to a single battery.


For a deeper look at one common failure mode, read our guide on troubleshooting common marine GPS issues. For cleaning corroded contacts, see how to remove oxidation from marine electrical terminals.
Marine Electronics Troubleshooting Safety Boundaries
Some troubleshooting is safe for owners. Some is not. Knowing where the line sits protects you, your crew and your boat.
Safe DIY tasks include:
- Visually inspecting cables, connectors and mounts
- Cleaning accessible terminals with the power off
- Resetting breakers and checking fuses
- Measuring voltage with a properly rated multimeter
Stop and call a qualified marine technician if you see any of these:
- Burning smells, scorched insulation or melted connectors
- Water inside a sealed electronic unit
- Problems with antenna or radar systems that require tuning
- Faults in fuel-system or engine-control wiring
- Repeated failures after you have already replaced parts
When in doubt, cut power first. Marine electrical systems can carry high current, and a shorted circuit can cause a fire.
Preventing Failures and Deciding When to Call a Technician
Most marine electronics failures can be prevented with routine care. Incorrect maintenance and material-stress damage are common causes of failure, so regular checks matter. For a complete maintenance routine, see how to maintain marine safety equipment.
Use this component-by-component plan as a starting point and adjust it to your vessel's use:
- Battery terminals and main grounds, monthly and before each season. Inspect for corrosion, clean with a baking-soda solution, rinse with fresh water and dry, then apply a corrosion inhibitor. Check torque on the terminal fasteners; a loose terminal is a voltage drop waiting to happen.
- Connectors and cable entries, quarterly and after any heavy weather. Separate accessible connectors, look for green or white buildup and water inside the shell, and reseat with dielectric grease. Confirm cable glands and junction boxes are sealed and that drip loops are in place so water runs off rather than into the fitting.
- Distribution panel and breakers, each season. With power off, check for discolored or heat-stressed terminals, tighten breaker lugs and confirm that no breaker is warm to the touch under normal load.
- Antenna and radar mounts, each season and after rough weather. Inspect coax connectors at the antenna base for water intrusion, check mount fasteners for corrosion and tightness, and look for chafed coax where it passes through the deck or mast.
- Network cabling and NMEA 2000 backbone, each season. Confirm terminators are in place at both ends of the backbone, check that drop cables are seated and locked, and look for corrosion on T-connectors.
- Batteries, quarterly. Check charge level, age and terminal condition. A battery near the end of its service life causes voltage sag that shows up as electronics faults before it shows up as a no-start.
- Before storage. Disconnect batteries, keep units dry, cover exposed connectors and recharge batteries as their maker recommends.
Store electronics carefully over the off-season. Follow this step-by-step winter storage method for marine electronics so units don't fail later.
Know when to call for help. If a fault persists after you have checked power, connections and configuration, a technician can run tests you may not have the tools for, including insulation resistance checks, current-clamp measurements under load and network diagnostics.
Charleston Yachting carries marine electronics, rigging and hardware from brands such as Garmin, B&G and Harken. Browse our full range to find the parts your boat needs, and reach out with questions about compatibility before you buy.
Frequently Asked Questions
What can I do if the electronics on my boat are not working?
Start with the power. Check that the main breaker or fuse for the affected device is closed, then measure voltage at the device's power connector with a multimeter while the system is switched on. If the voltage is low or absent, trace the wiring back toward the battery, checking for corroded terminals, loose connections and a poor ground. Only if power and ground are confirmed good should you suspect the unit itself. Charleston Yachting carries NMEA 2000 T-Connectors and power isolators from Bluewater, priced at $18.90 and $17.99.
Can corrosion cause marine electronics to fail?
Yes. Saltwater and moisture attack terminals, connectors and ground points, adding resistance that causes intermittent faults, voltage drop and erratic displays. Corrosion often looks like green or white crust on copper or tinned terminals. Clean contacts, apply dielectric grease, and replace connectors that are visibly degraded. Marine-grade tinned wire and sealed connectors resist this far better than standard hardware store parts.
How do I troubleshoot a marine electronics problem safely?
Switch off the circuit before disconnecting anything, and avoid working on energized high-current systems or anything involving the battery bank without training. Use a multimeter rated for marine use, test one circuit at a time, and document your readings. Stop and call a qualified marine technician if you find damaged insulation, burn marks, or repeated breaker trips, since these can indicate a fire or shock hazard rather than a simple fault.
When should I have a marine electronics technician inspect my equipment?
Call a technician when a fault persists after you have checked power, grounds and connections, when a unit shows heat or smoke damage, or when the problem affects navigation or communication equipment you rely on for safety. A technician can run diagnostics that go beyond basic voltage checks, including software configuration and interoperability faults between brands on the same NMEA network.
