

Store Marine Electronics for Winter: Step-by-Step

Table of Contents
- Assess Your Electronics and Storage Environment
- Winterizing Boat Electronics: Disconnect and Remove
- How to Store Boat Batteries Over Winter
- Protecting Boat Electronics from Moisture and Corrosion
- Marine Transducer Winter Storage and Protection
- Preparing Your Electronics for Spring Startup
- Storage Checklist and Common Mistakes to Avoid
- Frequently Asked Questions
Last Updated: October 14, 2026
Assess Your Electronics and Storage Environment
Before you start winterizing boat electronics, take time to understand what you're working with when you store marine electronics winter. Different devices have different temperature and humidity requirements. A Garmin chartplotter, for example, can handle cold better than some LCD displays.
Your storage location matters just as much as how you pack things. An unheated garage that dips below freezing creates condensation problems. A climate-controlled storage unit keeps electronics stable.
Here's what you need to assess:
- Device types: GPS units, depth finders, displays, radios, autopilots
- Manufacturer specs: Operating and storage temperature ranges
- Current location: Heated cabin, unheated cabin, garage, or climate-controlled storage
- Moisture risk: Exposed to spray, high humidity, or protected areas
Write down the temperature range for each device. Most marine electronics operate safely down to 32°F but stop functioning reliably below that. Storage temperatures are often lower. Check if your devices have specific humidity limits, many do.
Winterizing Boat Electronics: Disconnect and Remove
The decision to remove electronics or leave them aboard depends on your storage setup. If your boat sits in an unheated location, removal is the safer choice. Electronics left aboard face temperature swings, condensation buildup, and potential freeze damage.
Removing displays and portable units from boats stored outdoors or in unheated spaces eliminates most winter-related failures.
Step 1: Disconnect Power Before Storage
Never remove electronics while they're powered on. Start by disconnecting the negative battery terminal. Wait five minutes to let residual power drain from the system.
Then disconnect power at the device level. Most marine electronics have a dedicated power switch or breaker. Flip it to off. If your system has a main breaker for all electronics, use that instead.
Document which breaker controls which device. Take a photo of your breaker panel with labels visible. This prevents confusion later.
- Disconnect negative battery terminal first
- Wait 5 minutes for power to fully drain
- Switch off individual device breakers
- Photograph your breaker panel setup
Step 2: Remove Displays and Portable Units
Start with displays and touchscreen units. These are most vulnerable to cold and condensation. Unscrew mounting brackets carefully, some use quarter-turn fasteners, others use bolts.
For integrated systems like a Garmin chartplotter, note the exact mounting angle before removal. A photo from multiple angles helps during reinstallation. Some brackets are angle-specific and won't work if rotated.
Portable units like handheld GPS devices come off easily. Place them in a padded bag immediately after removal. Never leave them exposed on deck.
- Remove displays first, starting with the highest priority
- Take photos of mounting angles and bracket positions
- Use a padded bag for portable units
- Keep all fasteners in a labeled container
Step 3: Document Cable Connections
This step separates smooth spring startups from frustrating troubleshooting sessions. Before disconnecting any cable, photograph the connection point. Zoom in close enough to see the connector type and orientation.
Label each cable with painter's tape. Write the source and destination: "GPS to Autopilot" or "Transducer to Fish Finder." Use a waterproof marker so labels survive the winter.
For complex systems with multiple cables, create a simple diagram. Draw boxes for each device and lines showing connections. Include connector types (NMEA 0183, NMEA 2000, USB, power).
- Photograph every cable connection before disconnecting
- Label cables with painter's tape and waterproof marker
- Create a connection diagram for complex systems
- Store the diagram with your removed electronics
How to Store Boat Batteries Over Winter
Marine batteries face unique winter challenges. Cold reduces their capacity dramatically. A battery that works fine in summer may not start your engine in spring if stored improperly.
Winterizing boat batteries requires three steps: removal, inspection, and proper storage. Most boat owners skip inspection and regret it in spring.
Battery Removal and Inspection
Remove your marine battery before winter storage. Even a fully charged battery loses capacity sitting in freezing temperatures. Remove it from the boat entirely.
Inspect the battery for corrosion on terminals and cable connections. White or blue-green crusty buildup indicates corrosion. Clean it with a wire brush and baking soda solution. Corroded terminals prevent proper charging and cause spring startup failures.
Check the battery case for cracks or leaks. A damaged battery is worthless. Replace it rather than storing a compromised unit.
For gel and AGM batteries, check the manufacturer's storage requirements. Some have specific voltage levels they need to maintain. Others specify temperature ranges.
- Remove batteries from the boat completely
- Inspect terminals for corrosion and clean if needed
- Check the case for cracks or damage
- Note the battery type and voltage rating
Proper Battery Storage Location and Maintenance
Store your marine battery in a cool, dry location. A temperature range of 32-50°F is ideal. Avoid freezing temperatures below 32°F, which damage battery chemistry.
Keep batteries off concrete floors. Concrete wicks moisture and accelerates corrosion. Use a wooden pallet or plastic shelf instead. Ensure the battery sits on a level surface.
Check your battery monthly during winter. A fully charged battery loses only 2-3% of its charge per month in cold storage. A partially charged battery loses charge faster.
Store battery chargers and maintainers separately from the battery. They need power and dry conditions.
- Store at 32-50°F in a dry location
- Use a wooden pallet or shelf, never concrete
- Check monthly and maintain charge level
- Use a battery tender for long-term maintenance
Protecting Boat Electronics from Moisture and Corrosion
Moisture is the silent killer of marine electronics. It causes corrosion on circuit boards, shorts connections, and creates condensation inside sealed units. Winter storage amplifies moisture problems because temperature swings create condensation cycles.
Proper protection involves wrapping, sealing, and strategic placement. The goal is to isolate electronics from temperature changes and moisture sources.
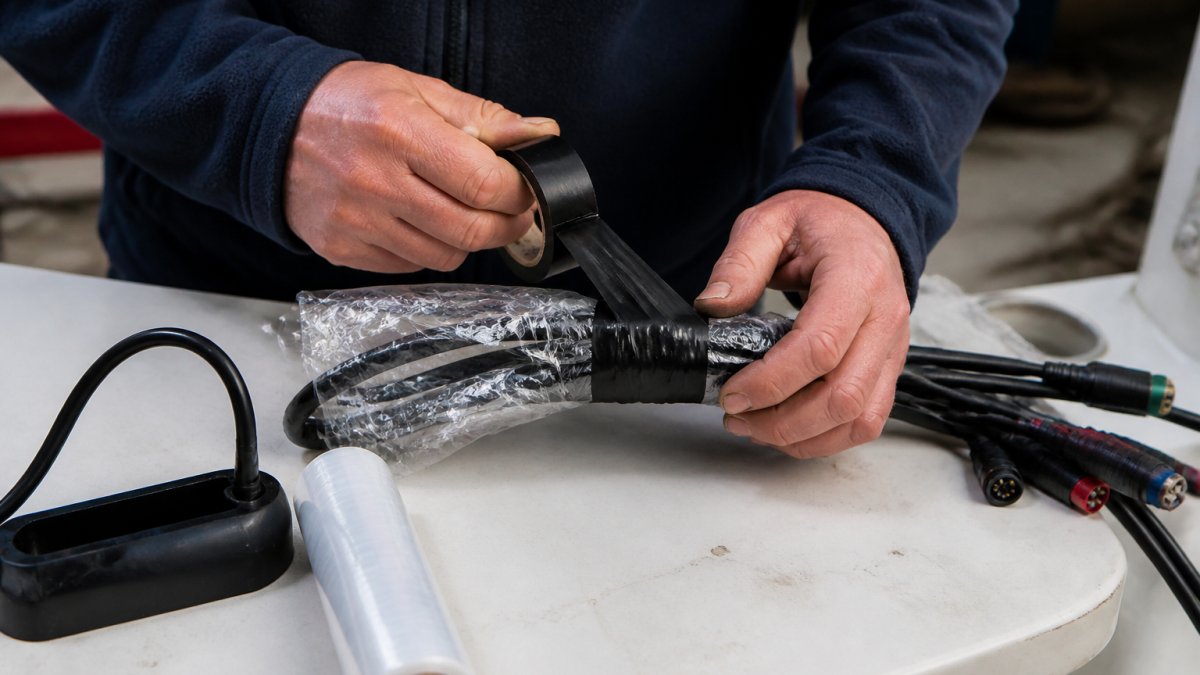
Wrapping and Sealing Techniques
Start with protective wrap for each device. Heavy-duty plastic wrap works well for displays and smaller units. Wrap each device individually, creating an airtight seal.
For extra protection, use shrink wrap instead of plastic wrap. Shrink wrap creates an even tighter seal. Heat it carefully with a heat gun, too much heat damages sensitive components.
Leave cable ends unwrapped temporarily. You need access to connectors during storage preparation. Wrap cable ends only after final disconnection.
Place a silica gel packet inside the wrap for each device. Silica gel absorbs moisture in the sealed environment. Replace packets monthly or when they become saturated.
- Wrap each device in heavy-duty plastic wrap
- Use shrink wrap for extra protection
- Include silica gel packets inside wrapped devices
- Replace silica gel monthly during storage
Addressing Connectors and Cable Ends
Exposed connectors are corrosion hotspots. Moisture enters through connector pins and causes electrical failures. Protect every connector, even ones you think are sealed.
Cover connector ends with electrical tape. Wrap tape around the connector body, covering all exposed pins. Use marine-grade electrical tape, which resists moisture better than standard tape.
For critical connectors, use heat-shrink tubing instead of tape. Slide the tubing over the connector and heat it with a heat gun.
Spray connector protectant on all exposed metal parts. Products designed for marine use create a thin protective coating. They dry clear and don't interfere with spring reconnection.
- Cover all connector pins with electrical tape
- Use heat-shrink tubing for critical connections
- Apply marine connector protectant spray
- Inspect connectors monthly for corrosion signs
Marine Transducer Winter Storage and Protection
Transducers are expensive and sensitive. A fish finder transducer can cost hundreds of dollars.
Transducers mounted through the hull face direct water exposure and freezing temperatures.
Start by draining any water from the transducer. Tilt the boat to allow water to drain toward the drain plug.
Wrap the transducer in protective plastic and place it in a padded storage bag. Store it indoors at room temperature.
For transducers that remain installed, apply protective grease around the hull penetration. This prevents water from entering the fitting during freeze-thaw cycles.
Document the transducer's original mounting angle. Take photos from above and below the hull showing the exact installation.
- Remove transducers from boats stored outdoors
- Drain water completely before storage
- Wrap in plastic and store indoors
- Document original mounting angle with photos
Preparing Your Electronics for Spring Startup
Winter storage isn't finished until spring startup succeeds.
Start your spring startup process two weeks before you plan to use the boat.
Inspect all stored electronics before reinstallation.
Charge batteries fully using a slow charger. Fast charging in cold conditions damages battery chemistry.
Reconnect power to your system and test each device individually before mounting.
Allow electronics to warm gradually before powering on. Condensation forms when cold devices warm too quickly.
Reinstall displays using your documented cable connections and photos. Follow your connection diagram exactly.
Test the complete system while still at the dock.
- Inspect all electronics for damage before reinstallation
- Charge batteries fully using slow charging
- Test individual devices before mounting
- Allow electronics to warm gradually before powering on
- Verify complete system function at the dock
Storage Checklist and Common Mistakes to Avoid
Use this checklist to ensure nothing gets missed during winterization.
| Task | Timing | Priority |
|---|---|---|
| Photograph all cable connections | Before disconnection | Critical |
| Disconnect power at battery | First step | Critical |
| Remove displays and portable units | Before storage | High |
| Inspect and clean battery terminals | Before storage | High |
| Wrap devices in plastic wrap | Before storage | High |
| Cover all connectors with tape | Before storage | High |
| Place silica gel packets in wraps | Before storage | Medium |
| Store batteries indoors at 32-50°F | Immediately | Critical |
| Check stored items monthly | Monthly | Medium |
| Charge batteries before spring use | Two weeks before | Critical |
| Test electronics at dock | Before departure | Critical |
Common mistakes to avoid:
Leaving electronics exposed to temperature swings.
Forgetting to document connections. You'll spend hours in spring trying to remember which cable goes where.
Storing batteries on concrete. Concrete wicks moisture and accelerates corrosion. Use a wooden pallet.
Ignoring corroded terminals. Corrosion prevents proper charging. Clean terminals before storage and check monthly.
Skipping the silica gel packets. These cost dollars but save hundreds in spring repairs.
Powering on cold electronics too quickly. Condensation forms inside sealed units. Let them warm gradually.
Winterizing boat electronics properly takes a few hours now but can prevent costly spring repairs.
Frequently Asked Questions
Should you remove marine electronics from a boat during winter storage?
Removing electronics is the safest approach. Freezing temperatures, moisture, and condensation damage sensitive components, especially LCD screens and circuit boards. If your boat stays in a heated indoor storage facility, leaving electronics aboard is acceptable. For outdoor storage, remove displays, fish finders, and other portable units. Permanently mounted transducers can stay if wrapped and sealed properly. Check your equipment manufacturer's temperature limits, most marine electronics operate safely between 14°F and 122°F.
Can cold temperatures damage marine electronics?
Yes. Extreme cold causes LCD screens to crack, batteries to lose charge capacity, and electrical connectors to become brittle. Condensation forms when cold equipment warms up indoors, creating moisture inside housings and corroding circuit boards. Transducers filled with oil can thicken in freezing temperatures, affecting sonar accuracy. Store all electronics in a warm, dry location (above 50°F) during winter months to prevent permanent damage.
How do you protect boat electronics from moisture and corrosion during winter storage?
Wrap all removable equipment in padded bags or bubble wrap, then seal with shrink wrap or plastic sheeting. Use electrical tape to seal cable ends and connector ports. Store in a climate-controlled space with low humidity, a heated garage or indoor storage facility is ideal. For equipment left aboard, install protective covers over displays and ensure all cable connections are sealed with dielectric grease. Check humidity levels regularly; use a dehumidifier if moisture appears.
What's the proper way to store a marine transducer over winter?
If your transducer stays on the hull, wrap it thoroughly with padded material and seal with plastic sheeting to prevent water intrusion and freezing. If removable, disconnect it carefully, clean the connector, apply dielectric grease, and wrap the cable end with electrical tape. Store in a warm, dry location indoors. Document the exact mounting position with photos before removal so you can reinstall it correctly in spring without compromising sonar performance.