

Why Sailing Instrument Calibration Is Important

Table of Contents
- Why Sailing Instrument Calibration Is Important for Safe Navigation
- How Uncalibrated Instruments Undermine Every Decision on Board
- Sailboat Compass Calibration and Heading Accuracy
- Wind Instrument Calibration for True Wind Data
- Depth Sounder Calibration and Reliable Depth Readings
- Boat Speed Sensor Calibration for Accurate Speed and VMG
- A Step-by-Step Calibration Workflow for Your Full Instrument Suite
- How Often to Calibrate and When to Call a Professional
- Frequently Asked Questions
Last Updated: October 4, 2026
Why Sailing Instrument Calibration Is Important for Safe Navigation
Sailing instrument calibration is the process of aligning your onboard electronics so the numbers they show match what is actually happening around your boat. Sailing instrument calibration is the difference between sailing on facts and sailing on guesses. A compass that reads five degrees off, a depth sounder that reports deeper water than reality, or a wind sensor that misreads angle can turn a simple harbor entrance into a grounding or a collision.
Navigation data drives nearly every decision on board. The helmsman steers by compass heading. The navigator plots position against depth readings and boat speed. The crew trims sails to apparent wind. When any of those inputs drift, every downstream decision drifts with them.
Below, we break down how calibration works for each instrument, how to verify results, and when to call a professional.
How Uncalibrated Instruments Undermine Every Decision on Board
The biggest mistake sailors make is trusting a display simply because it turns on. An instrument can power up, show steady numbers, and still be wrong.
Calibration errors compound. A compass off by four degrees sends you four degrees off course. Over a ten-mile passage, that small error puts you well off your intended track. Add a speed log reading two-tenths of a knot fast, and your velocity made good calculation feeds bad data to your tactics.
- Compass error pushes you off heading, especially in fog or at night
- Wind angle error leads to poor sail trim and wasted boat speed
- Depth error risks grounding in shallow or congested waters
- Speed error corrupts VMG, layline calls, and autopilot performance
The fix is not complicated, but it does require a routine.
Sailboat Compass Calibration and Heading Accuracy
Sailboat compass calibration is the process of correcting your magnetic compass so it points to true north, not a distorted magnetic field. This matters most for the helmsman, who steers by what the compass shows.
Compass error comes from two sources: variation and deviation. Variation is the angle between magnetic and true north, and it changes by location (From Compass to Cosmos: Charting the World Magnetic Model). Deviation is error caused by magnetic interference on your own boat, such as speakers, tools, or steel rigging near the compass.
To calibrate:
- Find a clear area away from docks and other boats
- Motor slowly through a full 360-degree turn
- Note the heading at each cardinal point against a known reference
- Enter the correction into your compass or chartplotter
Many modern heading sensors, including GPS-based units, self-correct for variation. Deviation from onboard interference still needs a swing.
Wind Instrument Calibration for True Wind Data
Wind instrument calibration aligns your masthead sensor so apparent wind and true wind readings reflect reality. This is the sensor most exposed to the elements, so it deserves regular attention.
Two numbers matter: wind speed and wind angle. If the angle is off, your sail trim suffers. If speed is off, your true wind calculation fails, because true wind depends on both apparent wind and boat speed.
A common approach is to sail directly upwind and downwind on a calm day, compare readings against a known reference, and adjust the offset. Some systems, like the B&G instrument documentation, offer autocalibration that handles much of this for you.
- Check for masthead alignment before calibrating
- Verify the sensor spins freely and reports smoothly
- Recalibrate after any rigging change or mast work
Depth Sounder Calibration and Reliable Depth Readings
Depth sounder calibration sets the offset between your transducer and the actual water surface or keel. Get it wrong, and you either scare yourself with false shallow readings or, worse, miss real ones.
Most depth sounders let you set an offset for one of three references:
| Reference | What It Measures | Best For |
|---|---|---|
| Waterline | Depth from surface to bottom | Navigation and chart matching |
| Keel | Depth below the keel | Shallow-water safety |
| Transducer | Raw sensor reading | Diagnostics and setup |
For safe navigation, many sailors set the offset to read depth below the keel. That way, a zero reading means you are about to touch bottom, not that you have a meter of water left.
Verify your offset by comparing readings against a known depth, such as a dock or a charted spot with a calm, flat bottom.
Boat Speed Sensor Calibration for Accurate Speed and VMG
Boat speed sensor calibration corrects your paddlewheel or speed log so it reports speed through the water accurately. This reading feeds your VMG, your laylines, and your autopilot.
Speed sensors are prone to fouling. A paddlewheel with growth or debris will under-read. Clean the sensor first, then calibrate.
To calibrate:
- Run a measured distance at a steady speed
- Compare your log against GPS speed over ground
- Adjust the calibration factor until they match
- Repeat at different speeds if your system supports it
Note that speed through the water and speed over ground differ when current is present. Calibrate in still water or account for current.
BG Sail Performance Sensor Pack (WS320, ZG100, DST810, N2K) [000-15974-001] →
A Step-by-Step Calibration Workflow for Your Full Instrument Suite
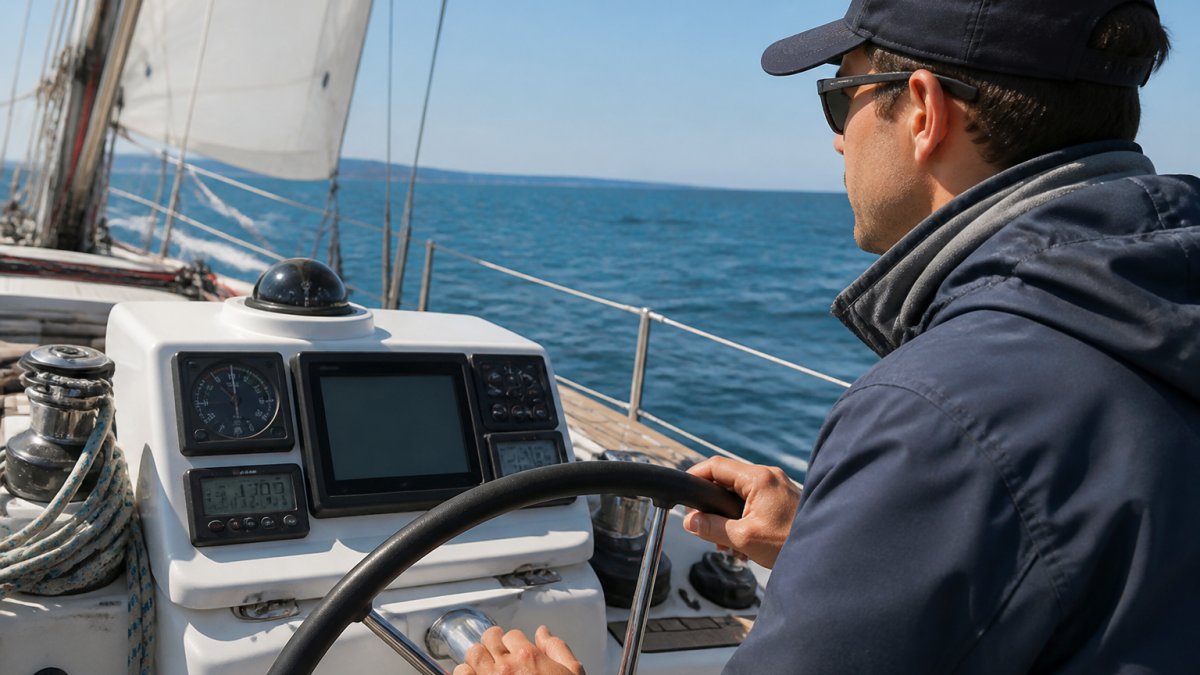
Most calibration advice stops at "swing the compass and adjust the offsets." What's missing is the order of operations and the reference checks that tell you whether an adjustment actually worked.
Work through the suite in this sequence. Each step assumes the previous one is already verified.
Step 1, Compass and heading. Everything downstream references heading, so start here. Motor slowly through a full 360-degree turn in open water, away from docks, moorings, and steel-hulled neighbors.
Step 2, Speed through water. True wind and velocity made good both depend on boat speed, so calibrate the log before the wind sensor.
Step 3, Wind sensor. With heading and speed verified, you can trust true wind. Check masthead alignment first: the sensor's forward axis should point along the boat's centerline.
Step 4, Depth sounder. The depth offset stands alone, so timing is flexible. Set the reference (waterline, keel, or transducer) and verify against a known depth, a dock at low tide or a charted spot with a flat, calm bottom.
Step 5, Verify the whole suite. After individual calibration, sail a short course and cross-check the numbers against each other. True wind direction should stay stable through a tack. Boat speed should track GPS speed over ground within the expected current.
For boats running a networked system, a processor like the B&G Triton Edge overview can handle boat speed calibration, wind correction for heel and trim, and autocalibration in one place.
Charleston Yachting carries complete sensor packs, including the BG Sail Performance Sensor Pack, which pairs a WS320 wind sensor, a DST810 depth-speed-temperature sensor, and a ZG100 GPS module for heading, heel, and trim.
![BG Sail Performance Sensor Pack (WS320, ZG100, DST810, N2K) [000-15974-001]](https://cdn.shopify.com/s/files/1/0842/4914/9751/files/96543XL.jpg?v=1775847901)
How Often to Calibrate and When to Call a Professional
Routine calibration keeps your readings trustworthy, but "once a season" is too blunt for a full suite. Different instruments drift at different rates, and some faults look exactly like calibration errors. Knowing the difference saves you from chasing an offset that will not fix the real problem.
A practical schedule by instrument:
- Compass and heading sensor. Verify at the start of each season and after any change near the compass, new electronics, speakers, tools, or rigging. Deviation changes when the magnetic environment changes.
- Speed log. Clean and check the paddlewheel monthly during the season if the boat sits in warm, fouling-prone water. Recalibrate after cleaning, because a fouled wheel under-reads and a clean one will not match the old factor.
- Wind sensor. Verify at the start of the season and after any mast work, rigging change, or sensor removal. Masthead units take the most weather, so check alignment and spin freely before trusting the numbers.
- Depth sounder. Verify the offset at the start of the season and after any transducer work. The offset itself rarely drifts, but the reference (waterline vs. keel) is easy to set wrong after a haul-out.
Beyond the seasonal baseline, recalibrate after any of these events:
- New instrument installation
- Rigging or mast work
- A grounding or hard bump
- Sensor cleaning or replacement
- Any noticeable drift in readings
Calibration error vs. hardware fault. This is where most sailors waste time. Calibration adjusts numbers; it does not fix a failing sensor or a loose connection. Use these symptoms to tell them apart:
- Steady offset that repeats, likely calibration. The reading is consistently high or low by a similar amount.
- Erratic or jumping readings, likely a wiring, connector, or power issue. Check the network backbone and terminations before touching offsets.
- Reading drops out or freezes, sensor or network fault, not calibration.
- One instrument disagrees with all others, suspect that instrument's sensor or its data source, not the whole suite.
- Error changes with boat motion or heel, installation or alignment problem, such as a transducer mounted at an angle or a masthead unit off centerline.
If your readings still disagree with known references after a careful calibration, the problem is likely a sensor fault, a wiring issue, or an installation problem rather than a calibration error. That distinction matters, and it is the point where DIY effort stops paying off.
DIY calibration works well for compass, depth, and speed. Wind sensors and networked systems with autopilot integration are trickier, because a bad wind offset feeds directly into autopilot steering and performance calculations. For professional vessels or complex suites, a certified technician can verify results against reference instruments and document tolerances, the acceptable error band and repeatability your system should hold. For weekend sailors, Charleston Yachting stocks the hardware you need to keep your own system accurate, with same-day shipping on premium electronics from B&G and Raymarine.
Frequently Asked Questions
What happens if sailing instruments are not calibrated?
Uncalibrated instruments feed wrong numbers to every display and autopilot on the boat. A compass with uncorrected deviation can be off by 10 degrees or more, sending you miles off course on a long passage. Wind angle errors cause poor sail trim, and a speed log reading low will distort velocity made good calculations. Depth sounder offsets that are wrong can make shallow water look safe. Each error compounds the next, turning routine navigation into guesswork.
How often should sailboat instruments be calibrated?
Most manufacturers recommend checking calibration at the start of each season and after any haul-out, rigging change, or new electronics installation. Compass calibration should be redone whenever you add or move metal gear near the binnacle. Speed and wind sensors benefit from a mid-season verification, especially if you race. Any time readings look inconsistent with what you see on the water, recalibrate before trusting the data again.
Can incorrect instrument calibration affect navigation and sail trim?
Yes, and the effects stack. A misaligned wind sensor makes apparent wind angles read wrong, so you trim sails to the wrong target and lose boat speed. An inaccurate speed log throws off true wind calculations and velocity made good, which affects tactical decisions. Compass deviation sends you off the rhumb line on longer legs. Calibration keeps navigation data consistent so the helmsman, trimmers, and autopilot all work from the same accurate picture.
How do you calibrate a sailboat compass?
Compass calibration starts with a deviation table built by swinging the boat through known headings and recording the error at each point. Many modern setups pair a magnetic compass with a GPS or fluxgate sensor that handles automatic compensation. Recheck deviation after adding electronics or metal near the compass.
Accurate readings only happen when your gear is set up right and working together. Charleston Yachting helps you get there with premium marine electronics, expert-curated rigging and hardware, and same-day shipping on the parts you need. Shop our full instrument and sensor selection, or browse the BG Sail Performance Sensor Pack to cover your core data in one order. Get started with Charleston Yachting and sail on numbers you can trust.