

How to Install Marine Radar on a Small Sailboat

Table of Contents
- What You'll Need Before You Start
- Marine Radar Mast Mount Options for Small Sailboats
- Step-by-Step: How to Install Marine Radar on a Small Sailboat
- Radar Cable Routing on a Sailboat: Wired vs. Wireless
- Garmin vs. B&G Radar Systems: Which Fits Your Boat?
- Common Mistakes to Avoid During Installation
- Retrofitting vs. New Build: Weight, Balance, and DIY Troubleshooting
- Conclusion
- Frequently Asked Questions
Last Updated: September 24, 2026
What You'll Need Before You Start
Installing marine radar on a small sailboat starts with one honest question: does your boat's electrical system and mounting geometry actually support the unit you're eyeing? Before you drill a single hole, gather these:
- Radar unit and radome with power and data cables
- Mounting plate or mast bracket rated for your dome's weight
- Stainless steel hardware (bolts, washers, backing plates)
- Marine sealant and cable glands
- Drilling template and hole saw
- Wire fish tape, heat shrink, and crimp connectors
- Multimeter for checking voltage drop
- Level and angle finder for vertical alignment
Marine Radar Mast Mount Options for Small Sailboats
Picking a marine radar mast mount is a geometry problem, not a brand problem. The right choice depends on your mast height, deck layout, and how much weight you can add up high.
Mast vs. Pole vs. Backstay Mounting
Each option trades height for hassle:
- Mast mount: Highest position, best horizon range, but hardest to service and adds weight aloft
- Pole mount: Easy to reach, simple cable routing, but lower and prone to obstruction
- Backstay mount: Clears the deck, good for split rigs, but needs a sturdy bracket
For most small sailboats, a mast bracket gives the cleanest signal path. A pole mount wins if you want to avoid climbing the mast at all.
Gimbaled Mounts and When You Need One
A gimbaled mount keeps the radar dome level as the boat heels. You need one if you sail in heavy weather and want consistent target returns. On a small sailboat that stays mostly upright, a fixed mount is fine and cheaper.
Step-by-Step: How to Install Marine Radar on a Small Sailboat
The installation itself follows a fixed sequence. Rushing any step usually means re-drilling later, and on a small sailboat a re-drill often means a new mast bracket.
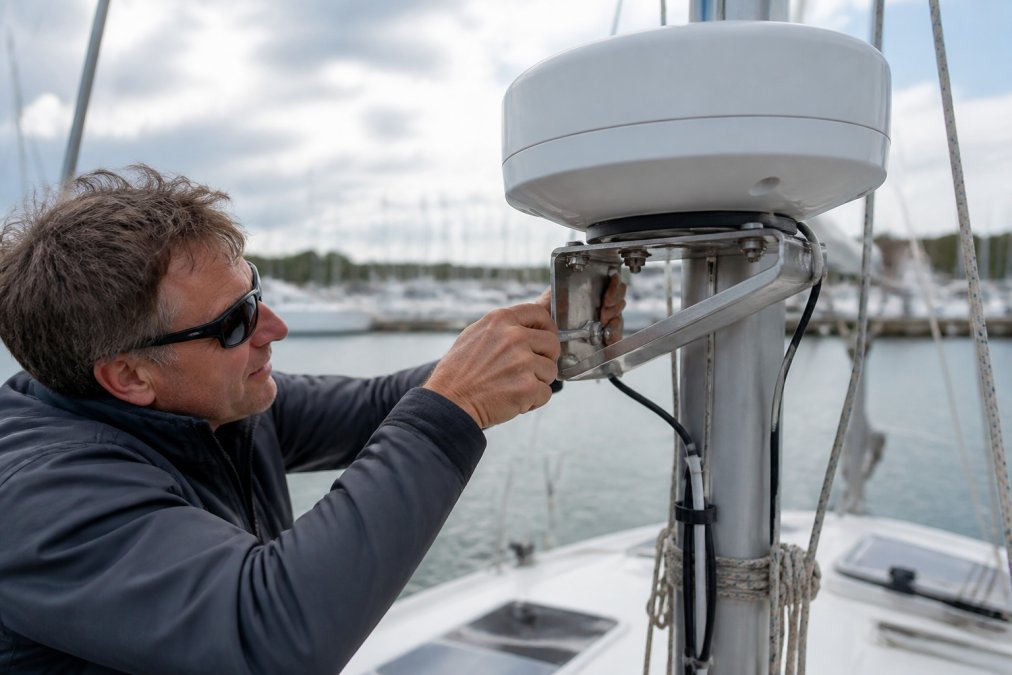
Step 1: Confirm Power and Wire Gauge Before You Drill
A radome transceiver pulls a real, continuous load, and small sailboats frequently run undersized 12V wiring. Before mounting anything, measure the actual run length from your breaker panel to the intended dome location, then check the manufacturer's specified circuit protection and minimum wire gauge for that distance. A common pattern is a 4-amp to 6-amp draw on a solid-state dome and higher on older magnetron units, but the only number that matters is the one printed in your unit's manual.
Step 2: Mark and Drill the Mounting Holes
- Mark the mounting holes with your drilling template. Tape the template down so it cannot shift.
- Center-punch each mark so the bit does not walk on the curved mast or deck surface.
- Drill pilot holes slightly smaller than your bolts, stepping up in size rather than jumping to the final bit.
- Deburr and chamfer each hole so the sealant has a clean surface to bond to.
- Apply marine sealant to every hole before inserting hardware, and bed the mounting plate itself, not just the fasteners.
- Bolt the mounting plate with backing plates inside the mast or deck. On a hollow mast, use a compression tube or a tapped plate so you are not crushing the section.
- Seal the cable entry with a cable gland sized to the cable jacket, not the individual conductors.
Use only stainless steel hardware. Anything else corrodes fast in salt air, and mixed metals create galvanic corrosion at the joint.
Step 3: Level the Dome and Set Vertical Alignment
Set the dome level when the boat sits still in calm water, with the rig tensioned as it will be under sail. A tilted dome skews your radar beam width and creates blind spots, and the effect is worse on a small boat where the dome sits close to the water.
Step 4: Route and Secure the Cable
If you go wired, secure the wiring harness every 12 inches to stop chafe, and leave a drip loop at the deck penetration so water runs off rather than into the gland. Use a cable gland at the deck penetration and seal the inside face as well. Avoid running radar cable parallel to VHF coax for long stretches; separation of at least a few inches reduces crosstalk.
Step 5: Calibrate Bearing Alignment and Gain
Calibration is the step most DIY installs skip, and it is the reason a correctly mounted radar still shows targets in the wrong place. After power-up, run the unit's bearing alignment routine against a known fixed target, such as a charted aid to navigation, and adjust until the target sits on the correct bearing.
Step 6: Check for Electromagnetic Interference
Mount the dome away from VHF antennas and other transceivers. A radar dome placed within a few feet of a VHF whip can degrade both systems, and the symptom is intermittent, which makes it hard to diagnose later. Keep the beam path clear of crew positions and observe the manufacturer's minimum safe distance.
Radar Cable Routing on a Sailboat: Wired vs. Wireless
Radar cable routing on a sailboat comes down to one decision: run a physical cable or connect wirelessly. Wired setups use an Ethernet connection or NMEA 2000 backbone and give rock-solid data. Wireless units cut installation time but depend on a clean signal path.
Raymarine Black Q24D Quantum 2 Doppler →
| Factor | Wired | Wireless |
|---|---|---|
| Install time | Longer | Shorter |
| Signal reliability | Highest | Good |
| Weight aloft | More | Less |
| Cable routing | Through mast | None |
Garmin vs. B&G Radar Systems: Which Fits Your Boat?
The Garmin vs. B&G radar systems debate usually ends with one answer: match the radar to your existing chartplotter. Both brands offer solid radomes with chartplotter integration and radar overlay. If your helm already runs a Garmin display, staying with Garmin avoids a second network. Same logic applies to B&G.
Common Mistakes to Avoid During Installation
Most install failures trace back to a handful of repeat offenders:
- Ignoring electromagnetic interference: Mount the dome away from VHF antennas and other transceivers.
- Skipping safety distance: Keep the radar beam clear of crew positions.
- Poor obstruction clearance: A boom or rigging in the beam path kills horizon range.
- Forgetting vibration dampening: Hard-mounted domes crack over time.
- No calibration: Bearing alignment must be set after install, or targets read wrong.
Retrofitting vs. New Build: Weight, Balance, and DIY Troubleshooting
Retrofitting radar onto an existing boat raises two issues most guides skip: weight and balance, and what to do when it doesn't work. This is the section that separates a clean retrofit from a mast climb you repeat twice.
Weight and Balance on a Small Sailboat
Adding a dome and mount puts weight high up, which shifts your center of gravity and affects how the boat sails in a breeze. On a small sailboat, every pound aloft counts, and the effect is not linear: weight added at the masthead has far more leverage than the same weight added at deck level.
A few practical rules:
- Keep the mount as light as possible. A machined aluminum bracket weighs a fraction of a welded steel one and will not rust.
- Place it close to the mast's centerline. Off-center weight aloft induces a persistent heel and makes the boat tack unevenly.
- Account for the cable. A wired run adds weight along the whole mast, not just at the top, and that weight is higher than you think once you include the jacket and connectors.
- Recheck your rig tune after installation. Adding weight aloft changes the load on the shrouds, and a boat that was tuned before the install may need adjustment.
DIY Troubleshooting: Working the Chain in Order
When the radar does not work, resist the urge to swap parts. Work through the chain in order and stop at the first failure:
- Check power at the breaker, then at the unit. A breaker that holds but a unit that browns out points to wiring, not the radar.
- Confirm the data connection lights on. No link light means the cable or the connector, not the dome.
- Verify the chartplotter sees the radar. If the plotter lists the radar but shows no returns, the problem is the radar or its calibration, not the network.
- Recheck bearing alignment if targets look off. A target that appears on the wrong bearing is almost always a calibration issue, not a hardware failure.
- Look for signal ghosting. Ghosting, where a target appears twice or in the wrong place, usually traces to a reflection off a nearby structure or to interference from another transmitter.
Wireless vs. Wired in a Retrofit
Wireless vs. wired also matters here. A wireless unit that drops signal is usually an interference or distance problem, not a dead radar. Try relocating the display or the access point before you return the unit. A wired unit that drops signal is usually a connector or a chafe point, so inspect the run at every tie-down.
Conclusion
Getting marine radar on a small sailboat right means planning the mount, the wiring, and the weight before you drill. Most problems come from rushed prep, not bad gear.
Frequently Asked Questions
Where is the best place to mount radar on a small sailboat?
Mast mounting is the most common choice for small sailboats because it raises the radar above obstructions and increases horizon range. A mast bracket typically places the dome 2 to 4 meters above deck. Pole mounts work well if you want to avoid drilling into the mast. Backstay mounts suit boats where weight aloft is a concern. Whichever you choose, keep the dome clear of sails and rigging so the radar beam width is not blocked.
Do I need a gimbaled mount for my radar?
A gimbaled mount keeps the radar dome level when the boat heels, which helps maintain a consistent radar beam and accurate bearing alignment. On a small sailboat that heels significantly, a gimbaled mount reduces signal attenuation caused by the dome tilting. If you sail mostly upright or in protected waters, a fixed mount with proper vertical alignment may be sufficient. The listing for your radar unit will specify whether it supports a gimbaled mount.
How do I route radar cables through a sailboat mast?
Start by checking whether your mast has an existing conduit or spare halyard. If it does, feed the radar cable through using a fish tape. If not, you may need to drill a small hole near the base and top of the mast, then seal both entries with a cable gland and marine sealant to create a waterproof seal. Wireless radar, like the Raymarine Quantum Q24C, uses Wi-Fi and a thin power cable, which simplifies routing through tight spaces.
Is radar on a boat worth it for coastal cruising?
Radar is valuable for coastal cruising because it helps you see through fog, rain, and darkness. Doppler radar, such as the Raymarine Quantum 2, highlights moving targets and color codes them as inbound or outbound, which is useful in congested waterways. It also supports chartplotter integration and radar overlay on your MFD. For a small sailboat, a compact radome like the Quantum Q24C weighs about 50% less than traditional magnetron units, so it adds less weight aloft.